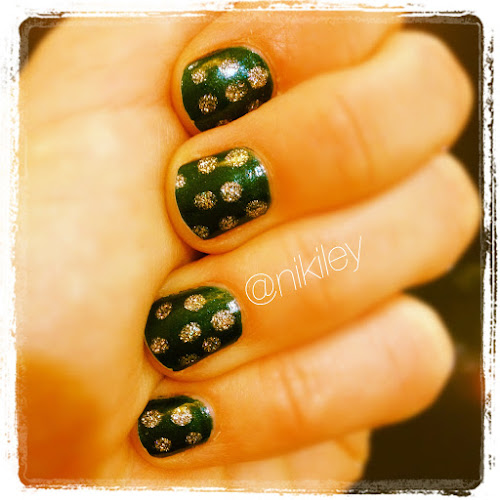
Instadump: Nail Edition
8:00 AMI'm sure my followers on Instagram are already aware of this, but I love painting my nails! Don't worry, this is not turning into a nail blog. Besides, the name of my blog wouldn't really be appropriate as I do not procrastinate when it comes to changing my nail polish. As soon as it starts to get chippy, off it comes. Anyway, I thought I would scour through my Instagram pics for manicures that I was especially happy with (basically the ones that I thought were worth taking a picture of) and linking the inspiration/tutorial that led to said mani.

First up is this straw manicure. It kinda reminds me of glass rings on a coffee table or something. It was pretty easy, however you have to wait for your base coat to completely dry. That is the worst part of all I think. I saw a much more colorful version of this on Pinterest (where else?) and here is what I got. Since the link isn't a tutorial I'll share how I did it. Take coffee stir straws and dip them in a little blob of nail polish, I use foil to blob it on to, then stamp it onto your nail. I found that the inside of the straw would have nail polish suspended across it and would make a circle instead of a ring, so I would just blow through the straw to clear that before stamping. Oh, and unlike me, maybe let the rings dry a little before your top coat.
Now who doesn't love glitter? Aside from removing the glitter I'm sure 99.99999% of nail polish fans like glitter. The's no particular skill involved in a glitter mani, but I've found a few that have inspired me.
1. Gradient glitter with a matte topcoat
2. This bright white with silver glitter was inspired by this Instagram pic via Pinterest.
3. There wasn't any inspiration for this heart glitter mani, I just liked the polish. Just a fair warning though, the hearts don't transfer onto your nails very easily. I don't think there's enough in the polish so you'll have to fish them out if you get this.
I've also been turned on to using those little hole reinforcers for easy half moon manicures, although for the life of me I can't remember the first place I saw the idea. There's not a lot to explain, but I usually tear open the circle so that it will lay better before I put them on my nails.
This water marble video was the one to finally get me to bite the bullet. I had seen them and understood the concept, but she just made it seem so easy. Because its pretty time consuming these are my only two attempts. I didn't even have to re-do any (why yes, I am awesome) because they got messed up. Sure there was a little bubbling here and there, but overall the results are pretty impressive. Oh, and if you're in the mood for compliments, do a water mani.
This one isn't a water marbled mani, but I think they are like cousins. One of the Instagramers I follow always has awesome nails (among other things) and she told me about this link to a Saran nails technique. I think next time I will use colors that contrast more.
Dot manicures are pretty easy too, but the do require some sort of inspiration. At the very least you should have some sort of plan for your dots. The first one was inspired by this, and the second one I just made up for the holidays. Can't find a dotting tool at a store near you? You can do what I did and buy this set at Michale's.
Not too long ago a Konad kiosk opened in the mall where I work and I quickly gave them some money. It's really easy to do, I just need to buy some more stamping polish.
You might remember from my skirt tutorial this water color mani I did. Sarah from Chalkboard Nails has this brief explanation on how to do a water color mani, as well as a link to a video. However it was her second attempt that inspired me to give this super easy technique a try.
Alright, last one. I used this gradient technique from The Beauty Department for a second Nuggets mani just the other night. It might not be on my fingers for too much longer, due to their 3-1 game deficit to the Lakers (boo Kobe you rapist!). I followed this tutorial from The Beauty Department, but instead of an ombré look, I used the team colors. The mani is a little fresh here and I usually just pick the rest of the polish off my cuticles when I take my morning shower so don't judge me.
So there you have it! Have you ever tried any of these techniques? Got any that I didn't mention worth trying? Does anyone know where I can get this cat stamping plate? I want it so bad!
This blog will now return to its normally scheduled programming.


5 comments
That was a pretty fanstastic post, I was sad when it ended. I am very impressed you managed water marbling not once but multiple times! And If you find out where to find the cat stamp let me know... Or even better, buy it and let me use it.
ReplyDeleteDoes your man, like mine, complain that the nail stuff is stinky and annoying? SO cute btw!
ReplyDelete@Daphne here's and mine does! Lol I don't Getty why it bothers then so much lol!
ReplyDeleteMaybe it's because they have ugly toes and fingers that never get to have pretty polish on them.
ReplyDeleteIf you are still looking for the plate with the cats on it you can buy it here http://www.ninjapolish.com/product.php?productid=17581&cat=282&page=1
ReplyDeleteit is out of stock right now but they have it on order as I type :)
Hi! I love comments, they're the best!