
Oh, Christmas Tree!
10:23 AM That sure is a fancy topper you have there!

I finally have a star to put on top of my pretty white tree! I was inspired to make it after seeing these amazing DIY ornaments on ModFruGal. They're made from strips of wood veneer and I. Love. Them!

So, with these über inspiring wood veneer ornaments paired with my topper-less tree I decided to make a giant star (like the smaller ones I made last year). After checking out the wood veneer strips at Home Depot I decided against it. The veneer was pretty, but one side had this really thick glue that is intended to be ironed onto wood. So off to the craft store for some bass wood! What what? Bass wood is right next to the balsa wood (that ultra light and flimsy wood that people make little airplanes out of, or whatever), but I thought it felt just a little sturdier. The thinnest pieces are 3/16" thick. So for this project you will need two sheets ($5 total) that are 2' x 3". Once I had my super thin wood in my studio I used a utility knife and a metal ruler to cut them into 1/2" strips like so.

Then, just like the smaller versions I made last year I wove and glued them together so they looked like this.

Ok, so now I will warn you, if you are already frustrated you might want to take a break. Go have a drink, watch some tv, whatever, because that was the easy part. In order to take your bass wood creation from looking like it belongs on the New Mexico State flag to a beautiful star you will need to twist and bend the strips so they come to a point. If you try that righthissecond your wood will break and you'll probably cry. First you will need to soak each corner in water to make the wood pliable (ooh, that actually is a technical term!). I soaked each corner for about ten minutes each. When I filled up the plastic container I used hot water, but as time went by it got cold. It didn't really make any difference, apparently water is water.

I didn't lay the whole thing in the water for fear that the glued parts would come undone, and as you can see, my container wasn't big enough. Since this part will be the most time consuming, go make yourself another drink. Maybe some spiked eggnog to make things festive! Mmmmm, eggnog.

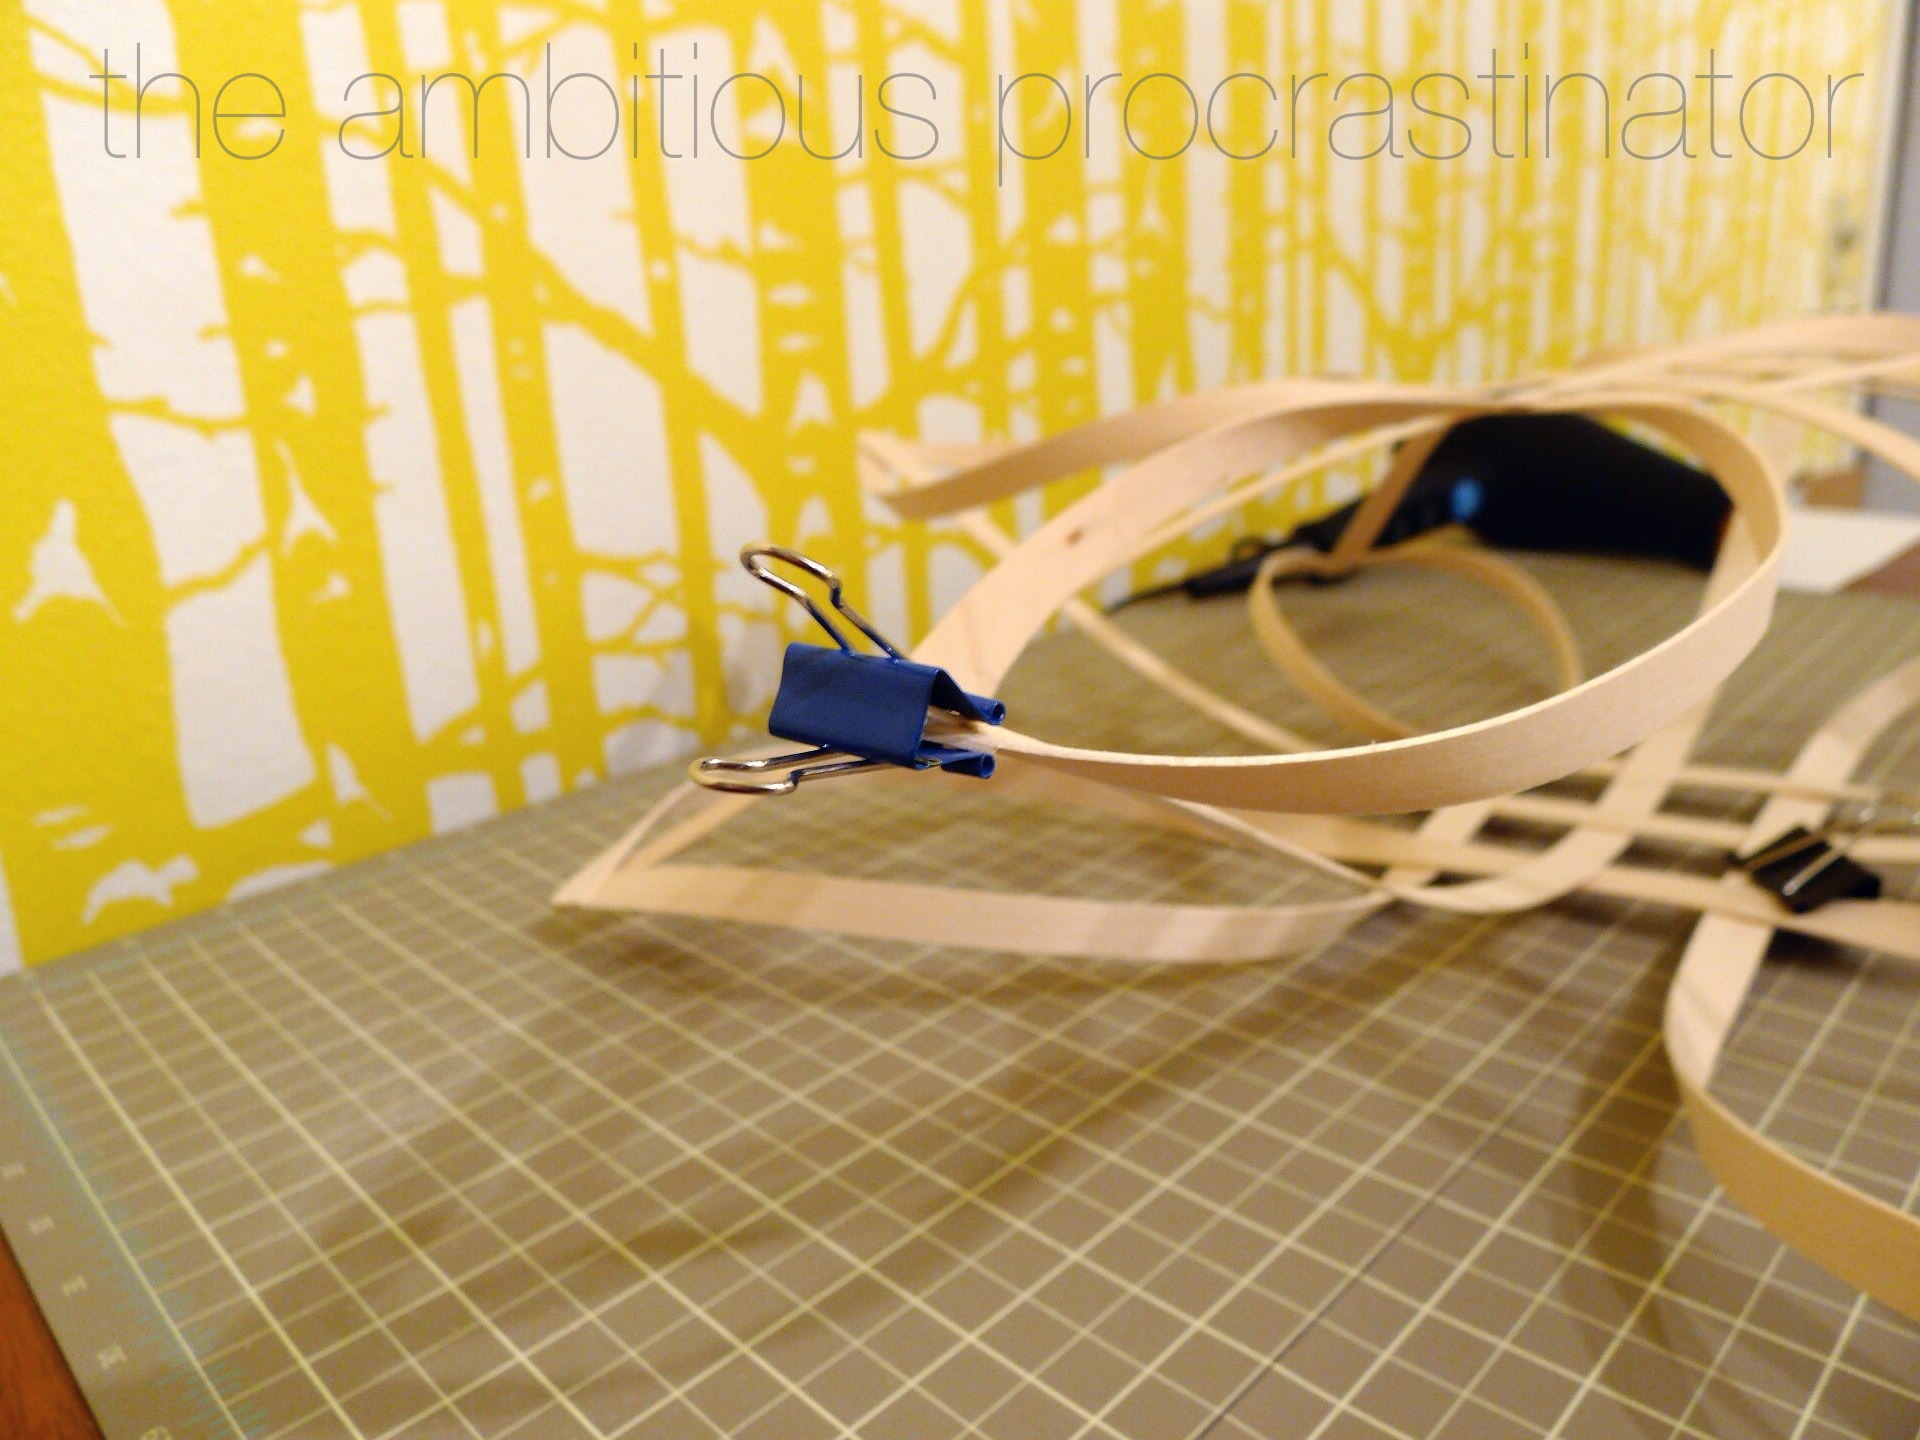
After ten minutes or so your wood should be soft enough to twist and bend together to create a point of your star. I used some binder clips to hold the strips together while they dried.
Once you have all your points created you have to let the wood completely dry out before you glue the ends together. Trust me, I didn't think it would be that important and long story short they didn't hold, and I had to reglue them. So just do what I say, mmkay? Oh, and a few of my woven joints started to come apart, I think from soaking in the water, so I just reglued once it was dry and used more binder clips to hold them together while they dried.

Once your two sections are twisted and glued, then they face each other and the left over strips get glued to the points on the other half. This is what makes it puffy and 3-Dimensional. Once my star was complete and dry I did a little ombré dying treatment using some yellow RIT dye and an old spray bottle. I used two cups of water and an eighth of a cup of dye and sprayed everything but the woven parts. Then I added another eighth cup of dye to the bottle and sprayed the outer two thirds of the points. Once that dried I added another eighth cup of dye to the bottle and just sprayed the last third of the points. I never added more water to the bottle so each time it got a bit darker, I learned that from my BFF Martha.

Now that I had this pretty star I needed some way to attach it to the top of my Christmas tree. That's where this jankey piece of wire comes in. It used to be a dry cleaning hanger, but I used my lady charm to turn it into a tree topper holder. Just so you know, lady charm really means some pliers and spray paint. It's not my finest work, but in the words of Farmer Hoggett, "That'll do pig. That'll do."

Now take that jankey wire thing and your beautiful star and stick 'em on top of your tree!


Ahh's! I can't stand how good my tree looks! Especially in these pictures. It doesn't look quite as magical or full as it does in the pictures.

So have you ever made a tree topper? How did you actually attach it to the top of your tree? Who else has a white tree out there? And if you're looking for more DIY Holiday decor check out my projects from last year:


3 comments
It's BEAUTIFUL!! I want one just hanging up all the time!
ReplyDeleteThat is beyond any tree topper I ever seen. It looks great on your beautiful tree which is already stunning.
ReplyDeleteHappy Holidays!
I am launching my new DIY Blog: My Personal Accent http://www.mypersonalaccent.com
I am looking forward to more of your inspiration.
Great job! I love how delicate the curves are...turned out superb!
ReplyDeleteHi! I love comments, they're the best!